

Login with your email address and password.
Stay signed in: With this option, we will restore your session automatically if you close your browser without logout. Therefor we use cookies. Do not check this if the computer is used by several users. Logging out terminates the session always finally. Optionally, you can of course use the auto-save-function of credentials of your browser for fast login.
The account of the initial user is always the Admin account. The Admin-user is a privileged user, who can manage and maintain the whole time recording system (see The different user roles).
The attendance list shows all staff members with their current time stamp and provides information on their current presence. So the attendance list works just like a common table of attendance. How a time stamp is displayed in the attendance list will be determined by the type of the time stamp as well (see Creating a new time type). By default, the attendance list is displayed for the Admin only. It can be turned on or off in the Settings for other user.
The Timer is used for recording the working hours and performs like a classic time recorder. This way of time tracking is available to all user.
Simply confirm the creation of a time-entry by clicking on the according Start - or Stop-button. The application captures the working hours in minute increments. Working hours that span over more then one day are recognized.
If in the Settings the entry Timer tolerance has a value exceeding 0 minutes, then the users may adjust the punching-time of the attendance recorder by the given time span.
The time for the time tracking is obtained from Goodtime-server, considering your time zone (see Settings). The time displayed in your browser is not updated automatically. You can trigger an update by clicking on the refresh-icon on the head of the recorder. But whatever time is shown in your browser - always the server time is used for the time stamp. The server time is synchronized via NTP - so it is very accurate.
Click on Timesheet on the menu to view or edit the recorded working hours. If you are in the role of an admin or timesheet manager, clicking on time sheet brings up a list of all selectable users (including your own user). Please select the desired employee, by simply click on the user. If you are only allowed to edit your own time entries, you will be forwarded to your own time sheet directly.
The admin and timesheet managers can view and edit the time stamps of all users - including their own working hours. Regular user whose property may edit own time stamps is checked in the settings, can change their own time stamps in the time sheet as well. If this option is not ticked for a user, the user may view his own time data but can not change it by the time sheet.
In the top of the page you can set the desired week, the desired month and year. The time stamps for the set period of time is displayed immediately after the selection. When you choose All for the weeks value, the time stamps for the whole accordant month will be displayed. You can also use the buttons Week and Month to switch between the two views. With Today you will always jump to the current week or for the current month.
Click on Create new Time Stamp to add a new time entry. In addition to the period of time you can adjust the type of time entry (aboard, leave ...) and assign a project for the time stamp if desired. Fields which are not relevant to the selected time type are hidden automatically. For example, for time stamps which are calculated by the day (see Create a new time type) a field for the date but no fields for entering the start- or end-time are displayed. If the time stamp exceeds the limit of a day, click on the over several days-check box. Additional fields for a 'multi-day' time stamp will be displayed then. The generated time stamp will cover the entire adjusted period.
Time entries can be entered in an "abbreviated" style, such as 138 instead of 1:38PM or 10p for 10:00PM - in the AM/PM time format (or 1338 for 13:38 and 15 for 15:00 if you use the 24-hour time format).
Depending on whether you ticked the Allow overlapping timestamps option in the Settings the application proofs if there already exists a time stamp in the given time period.
Time entries can be locked by the months - that means they become protected against changes. Lockable time entries must be ticked in the Settings in order to use this function.
To lock a month, click Lock in the timesheet next to the month- or week selection. The time entries of locked months can no longer be changed; time entries can not be deleted or added for this month.
A lock can be removed by clicking on Unlock. The Administrator and users with the timesheet manager role are authorized to unlock a Month.
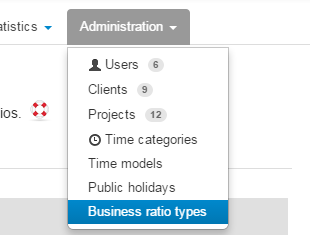
To enable an employee to record working hours, you must first create the employee: As an admin or in the User Manager role, select Users from the Administration menu. Then click Create New User:
Enter a valid email address for the new user. This email address is also the name for the login.
If you change the User status of the user from active to closed then the user can not logon any longer. This approach is for example recommended for employees who leave the company.
If you don't want to make any further settings, simply fill out the first tab and click Save. The employee can now use the time tracking system.
In the Permissions tab, you can set the permissions for employees and assign roles for various management tasks in your time tracking system. More »
With the roles of User Manager, Timesheet Manager, Project Manager, and Application Manager, you can assign users roles for various management tasks in the time tracking system. See: Permissions and User Roles
Details on the permissions of the individual roles can be found in this tabular overview »
In the Time model tab, a working time model can be assigned to the user. Learn more about working time models.
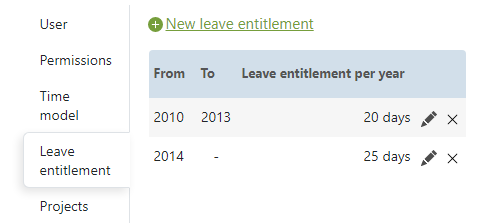
On the Leave entitlement tab, the leave entitlement is set up for this user. Further information on Leave entitlement management.
In the Projects tab, the employees participation in projects can be defined. For the user only those projects are displayed in the project selection field for which he is a participant. Alternatively, project participation can also be managed at the individual projects - see also: Create a new project.
Employees can be organized into teams. This simplifies the management of permissions and project memberships. Teams can be managed by you as an admin or user manager in the Administration menu under Teams. More »
Admin and timesheet manager are permitted to create new time types. Choose Time types in the Administration menu and click on Create new time type.
Label: The name of the time type which is displayed to all user.
Input Type: Working time can be tracked by the hour or by the day (e.g. for leave). Just select the type of tracking you need.
Sum type: Sets how the time type is treated in the summation.Project time: If this box is checked, then the time type can be assigned to projects. For example for the time type 'leave' is does not make sense to allow an assigned to projects.
On Site: The entry determines whether the activity is carried out on location. So if the employee is on site. Time stamps with checked On site-field will be listed on the Attendance list as such.
Leave:
If this check box is checked, then the time entries with this time type are considered for the
calculation
of the taken leave or the remaining entitlement of holidays. The input type of the time type
(by the hour or by the day) must match the type of the leave entitlement (days or hours),
so that the according time item is taken into account.
Tip: If you use only one of the two leave
entitlement types (days or hours) in your web-based time sheet, we recommend to delete
the unused vacation time type or set its status to close - to eliminate erroneous
input in the first place.
Status If you set the status to 'closed' then this time type can't be selected for time entries any longer. Any change in an existing time type also affects all existing time entries that use this time type. Therefore sometimes it is better to create a new time type and set the status of the old type to 'closed' than edit the existing time type.
Default Selection: The selected time type is displayed as 'pre-selection' for all users for choosing a time type.
Automatic breaks are set up for each employee in the Time model tab. More »
In the Public Holidays menu, public holidays and days off are managed for your online time sheet. More »
Business ratios can be used to store numeric values with a time entry. For example, expenses or the number of driven kilometers. Please note that Business ratios can be enabled or hidden in Settings - General.
Under Administration Business ratios types, the various types of Business ratios are defined. A Business ratios type essentially consists of a name (for example, "expenses") and an optional unit (for example, "€"). These Business ratios types can then be stored as a numerical value with a time entry.
Vacation management records and displays leave entitlement, leave taken, leave paid out and remaining leave. It displays holiday data only for employees for whom a holiday entitlement has been entered. Read more »
If you are logged in as admin or project manager the menu item Projects is displayed in the Administration menu. Click it and then click the link Create new Project. Enter a name for the project. This name will be displayed for the selection of the project for time tracking. If you have the option Enable clients for projects ticked in the application settings, you can assign a customer the new project.
In the tab permissions the project participants can be selected. The default setting All users are project participants makes all active users to project members automatically. Pick Select project participants individually... to select single staff members to participate in the project. Only project members can assign the project to time entries. So for the staff member only those projects will be displayed in the time tracking system that concern him actually.
If you set the Project state to closed, the project is basically no longer available for assignment to time stamps.
You can turn off the selection of projects respectively the complete project management if you don't need it: See Settings.
In the Goodtime account settings, you can change your master data, such as your company address. Issued invoices and ongoing costs for the time and attendance system also displayed here. The administrator and application managers have access to these settings.
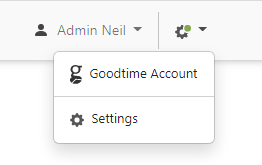
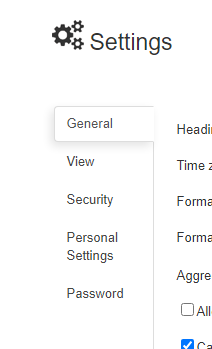
The settings are divided into tabbed pages by topic. The individual sections in detail:
Under the menu item Export working hours, working times can be exported. Each user can always export their own working time. Administrators and time sheet managers can also export the working hours of other employees. More »
The menu item Export project hours is available to administrators and project managers.
The selection of the export period is analogous to the Export of working hours. From the list of all open projects, arbitrary projects can be selected for export. The time data of each project are stored in a single Excel spreadsheet. So the result of the export is always a single Excel file containing the time data of all selected projects.
The iCalendar format is widely spread and used, amongst others, by Apple's Calendar and Google Calendar. Possible filename extension for iCalendar files are: .ics, .ifb, .iCal, .icalendar or .iFBf. So for example you can record your working time with the Google Calendar and then import the data into the Goodtime time tracking system. More »
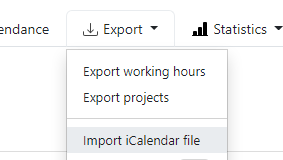
Import working times from a klog file. More »
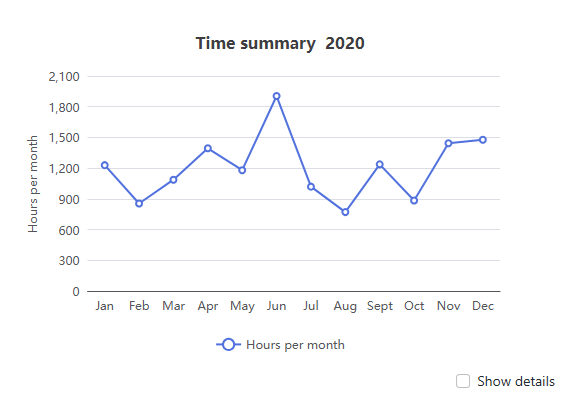
Statistics prepare and summarize your timekeeping and/or project tracking data. Click on the Statistics menu item and select one of the statistics. For example, you can choose from statistics on working hours or projects. Depending on the individual configuration of your timekeeping system and the employee's roles, the statistics view can vary. Both overview data for the entire timekeeping and details, for example, for projects or customers, are displayed. More »
There is a REST interface for Goodtime for software developers for querying and creating time entries.
The Android and Apple iOS apps cover the most important functions of the desktop version:
Here you can find a free time clock station for Android that is compatible with Goodtime time tracking.